
Last Updated: November 17, 2026
Quick Summary
Replacing a solar pool heater sensor starts with confirming the fault using a multimeter, then buying a probe matched to your controller’s resistance curve and connector style. Shut off power at the breaker, close the valves, swap the probe in its port, and reconnect the wires to the same terminals. Watch the controller for a full heating cycle to verify the fix.
- A failed sensor is the most common reason a solar pool heater stops working, and you can confirm it in about ten minutes.
- Most pool and solar sensors are 10K thermistors reading about 10,000 ohms at 77°F.
- A sensor problem affects one reading, while a controller problem affects everything.
- Never measure resistance on a live circuit; disconnect the sensor and isolate it first.
- Hand-tighten the retaining plug only, because overtightening cracks the plastic connector.
Table of Contents
- How to Tell Your Solar Pool Heater Sensor Is Bad
- Where the Sensors Sit on a Solar Pool Heating System
- Solar Pool Sensor Troubleshooting Before You Buy Parts
- Solar Pool Temperature Sensor Testing With a Multimeter
- Tools and Compatible Replacement Sensors
- Step-by-Step: Replacing Solar Pool Heater Control Sensors
- Solar Pool Heater Sensor Wiring and Routing
- Verifying the Fix and Common Installation Mistakes
- Frequently Asked Questions
How to Tell Your Solar Pool Heater Sensor Is Bad
A failed sensor is the most common reason a solar pool heater stops working, and you can confirm it yourself in about ten minutes. At Dixie Pool Solar Heating & Misting, we see the same pattern constantly: the panels and pump are fine, and one small temperature probe has quietly stopped reporting.
Your controller makes every decision based on two readings: the pool water and the panel water. When one goes wrong, the controller either runs the pump when it shouldn’t or refuses to run it when it should.
So what does a bad solar pool heater sensor actually look like from the outside? Three symptoms show up again and again:
- The display shows a temperature that never moves, even on a hot afternoon.
- The reading jumps wildly, or shows a number that makes no sense for the weather.
- The controller shows an open sensor or sensor fault code.
One of these alone is a hint. Two together is a diagnosis.
Symptoms That Point to the Sensor, Not the Controller
The biggest mistake we see is homeowners replacing a controller when the sensor was the problem. Controllers rarely fail; sensors fail often, because they sit in water, heat, and sun all day.
Here is how to tell them apart:
| Symptom | Likely Sensor | Likely Controller |
|---|---|---|
| Reading frozen at one number | Yes | No |
| Reading jumps erratically | Yes | Rarely |
| Sensor fault code on display | Yes | No |
| Display completely dead | No | Yes |
| Pump runs but valve never moves | No | Yes |
| Both readings wrong at once | No | Yes |
The tell is scope. A sensor problem affects one reading. A controller problem affects everything.
If your heater misbehaves in ways that don’t fit the sensor pattern, our guide to common problems with solar pool heating systems covers the wider list of faults, and our walkthrough on fixing pool heater temperature issues helps you sort a general temperature problem from a sensor fault before you spend money on parts.
Where the Sensors Sit on a Solar Pool Heating System
A solar pool heating system uses two temperature sensors, and knowing where they live saves you a lot of searching. The pool sensor mounts in the plumbing near the pool pump, usually in a drilled port with a rubber grommet and a retaining plug. The solar sensor, sometimes called the collector sensor, mounts on or near the solar panels on the roof.
Some systems use a third sensor for freeze protection. Same part, different location.
Before you touch anything, trace the wire. Each sensor runs a cable back to a labeled terminal on the controller board, which is where you will test and where a loose connection hides.
A bad connection at the controller can look exactly like a bad sensor, so check the terminal screws before you condemn the probe.
Solar Pool Sensor Troubleshooting Before You Buy Parts
Work through these checks in order, and you will avoid buying a part you don’t need.
- Confirm the controller has power and the display is lit.
- Check that the pump is running and water is moving.
- Look for a fault code on the controller display.
- Compare the pool reading to a separate thermometer in the water.
- Wiggle each sensor plug at the controller and watch for the reading to flicker.
- Inspect the sensor cable for cracks, sun damage, or chew marks.
If the reading changes when you wiggle the plug, the sensor is fine and the connection is the problem. Clean the terminal and reseat the plug.
If the reading stays frozen no matter what you do, the sensor is the suspect. Move to testing.
If your system shows several problems at once, it may be past a simple swap. Our guide to the signs your solar pool heater needs repair helps you judge whether this is a DIY sensor job or a call to a technician.
Solar Pool Temperature Sensor Testing With a Multimeter
Solar pool temperature sensor testing takes one tool and about ten minutes, and it separates a bad sensor from a bad controller, wire, or terminal. You are measuring resistance, which tells you whether the probe is alive and whether the signal reaches the controller.
Set your multimeter to the resistance setting, usually marked with the omega symbol. Disconnect the sensor from the controller first so you are measuring the probe and its cable, not the board. Then touch one probe to each wire end.
Reading Resistance at the Sensor Plug
Most pool and solar sensors are 10K thermistors: about 10,000 ohms at 77°F, rising as the sensor gets colder and falling as it warms. Expect roughly 6,500 ohms near 90°F and 16,000 to 20,000 ohms near 60°F.
What the numbers mean:
- Within about 10 percent of the expected value for the water temperature: sensor is healthy.
- Zero or near zero: shorted sensor or pinched cable, replace it.
- No reading at all (OL or open): open circuit, replace it.
A quick sanity check: hold the sensor in your hand and watch the resistance fall. A working thermistor responds within a few seconds. A dead one does not.
Continuity and Voltage Checks at the Controller
Resistance at the plug tells you about the probe; continuity and voltage at the controller tell you about the path.
Next, restore power and set the meter to DC volts. Measure across the sensor terminals on the controller; many controllers supply 3 to 5 volts DC excitation across the thermistor input.
Watch out: never measure resistance on a live circuit.
Interpreting Readings Against Actual Water Temperature
The most useful test is a comparison. Drop a separate thermometer into the pool near the return, let it stabilize, and note the temperature. Then compare the sensor resistance to the expected value for that temperature. A sensor reading 10,000 ohms in 90°F water is reporting roughly 77°F, wrong by more than ten degrees, confirming a failed probe even though the resistance number looks healthy.
This comparison helps separate a bad sensor from a bad controller.
Tools and Compatible Replacement Sensors
You do not need a truck full of tools for this job. A basic kit gets it done:
- Multimeter with resistance and continuity settings
- Replacement sensor matched to your controller
- Adjustable wrench or channel locks
Compatibility matters more than brand. Sensors come in different resistance values and connector styles, and a mismatched probe will read wrong even when it is brand new. Before you order, verify four things.
Verify Sensor Type and Resistance Curve
Most pool and solar controllers use a 10K thermistor, but not all. Some use a different nominal resistance, and some use a non-interchangeable resistance curve even at the same nominal value. Check the controller manual or the label inside the cover for the specified sensor type, and order that part number or a manufacturer-approved equivalent. A sensor that reads 10,000 ohms at 77°F but follows a different curve reports plausible numbers at room temperature and wrong numbers in hot or cold water.
Verify the Connector and Cable
Match the connector style to your board: plug-in, bare terminals under screws, or weatherpack-style sealed. A bare-terminal sensor can often be adapted with waterproof connectors, but a plug-in board should get a plug-in sensor. Also check cable length, a roof run is often longer than a pool run, and a short cable means an unplanned splice.
Verify Controller Compatibility
Write down the controller make and model before you shop. Manufacturers publish compatibility lists, and a sensor kit made for your model saves a return trip. If the manual is gone, look for a model label inside the cover or on the back of the enclosure; a photo of the label and old sensor is usually enough for a supplier to match the part.
What to Buy
Buy a sensor kit made for your controller model when you can, as kits generally include the probe and matching connector.
Watch out: do not substitute a generic 10K sensor just because the old one looks similar. A mismatched curve is the most common reason a brand-new sensor reads wrong, sending homeowners back to the controller board chasing a parts mismatch.
Step-by-Step: Replacing Solar Pool Heater Control Sensors
Replacing solar pool heater control sensors is a straightforward job once you have confirmed the fault. Time required depends on the system and whether the roof sensor is involved.
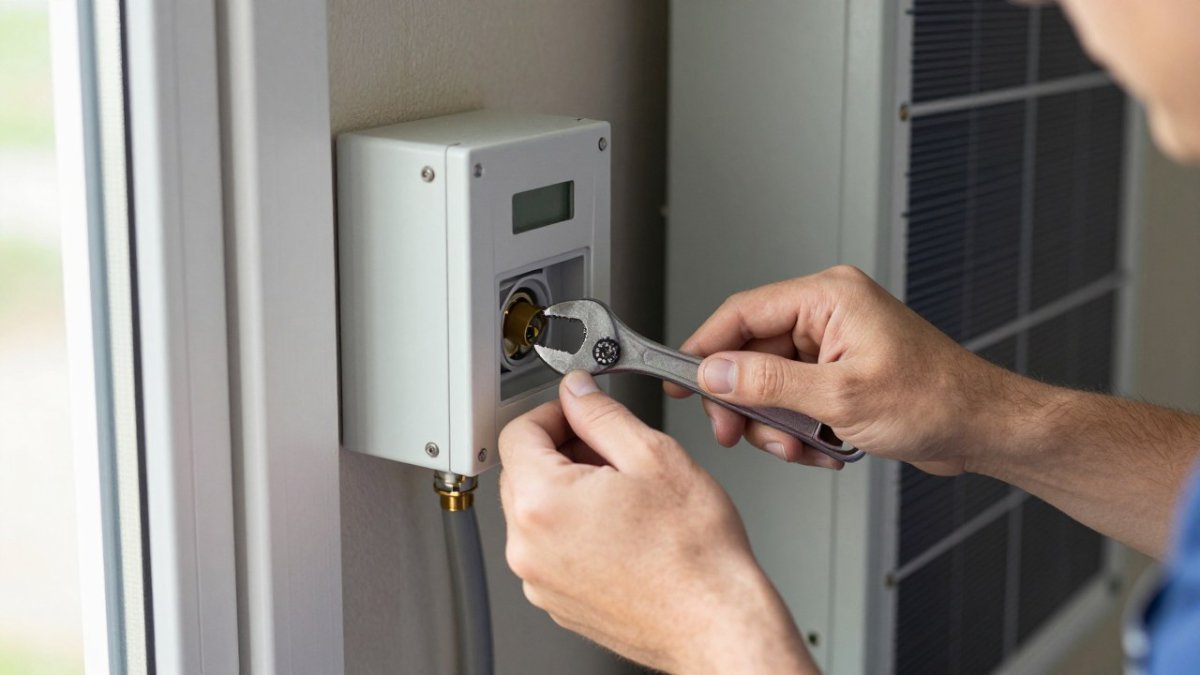
Shut Off Power and Drain the Line
Turn off power at the breaker before you open the controller. Not the switch on the panel, the breaker. Then shut off the pump and close the valves on either side of the sensor port so water stops flowing.
Watch out: skipping the breaker step is how people get shocked at a controller board. The low-voltage sensor circuit sits next to line voltage, and a slip costs more than a service call.
Disconnect, Install, and Seal the New Sensor
- Photograph the wiring before you remove anything.
- Disconnect the old sensor from the controller terminal.
- Remove the retaining plug and pull the old probe from the port.
- Push the new sensor into the grommet until it seats fully.
- Refit the plug and hand-tighten only.
- Connect the wires to the same terminals.
- Restore power and water flow.
Hand-tighten the plug. Overtightening cracks the plastic connector, and that leak shows up a week later.
Solar Pool Heater Sensor Wiring and Routing
Solar pool heater sensor wiring fails more often than the sensor itself, so route it like it matters. Run the cable along existing conduit or pipe where you can, and secure it every couple of feet with zip ties.
Keep these rules in mind:
- Never stretch the cable tight across a roof. Leave a little slack for expansion.
- Keep the run away from sharp edges and hot metal.
- Seal every roof penetration with silicone.
If you are splicing a run, use a proper waterproof connector. A wire nut in the sun will corrode within a season.
Verifying the Fix and Common Installation Mistakes
After the swap, watch the controller for a full heating cycle. The pool reading should match your thermometer within a degree or two, and the solar reading should climb when the sun hits the panels.
The mistakes we see most often:
- Installing a sensor with the wrong resistance value.
- Leaving the old grommet in place and fighting a leak.
- Routing cable where the mower or a dog can reach it.
If the reading still looks wrong after the swap, the controller calibration or the board itself may be the issue. A professional solar pool heater inspection confirms the fix and catches anything the DIY test missed. Once the sensor is working, keep it that way with our solar pool heating maintenance guide, which covers the seasonal checks that prevent repeat failures.
A sensor that reads wrong quietly costs you the whole swimming season, and most homeowners only find out when the pool stays cold in April.
Frequently Asked Questions
How do I know if my solar pool heater sensor is bad?
The clearest sign is a controller reading that does not match reality. If the display shows a pool temperature far from what a handheld thermometer reads, or the solar valve never opens on a sunny day, the sensor is suspect. A sensor reading stuck at the same number for days, or one that jumps wildly, also points to a failed sensor rather than a controller problem. Test resistance at the plug with a multimeter before buying a replacement.
Where are the sensors located on a solar pool heating system?
Most systems use two sensors. The pool water sensor sits in a fitting on the return line near the pump and filter, often secured with a grommet or a small plastic connector. The solar or collector sensor mounts on the roof near the panels, usually clamped to a collector header or pressed into a dedicated port. Trace the sensor cable from the controller board to find both ends quickly.
Can I replace a solar pool sensor without replacing the controller?
Yes. The sensor is a separate part and the controller rarely needs replacing. What matters is matching the replacement sensor to the controller’s expected resistance, often a 10K resistor type. Check the controller manual or the label on the old sensor before ordering. If a new sensor of the correct type still gives incorrect readings, then test the controller board and its sensor input before assuming the unit is dead.
How do I test a solar pool temperature sensor?
Turn off power to the controller, disconnect the sensor plug, and set a multimeter to resistance. Measure across the sensor leads and compare the reading to the temperature resistance table in your controller manual. Warm the sensor in your hand and watch whether resistance changes; a sensor that stays flat or reads open is faulty. This solar pool temperature sensor testing step takes a few minutes and saves you from buying parts you do not need.


Leave a Reply