Table of Contents
- Why Solar Pool Heating Maintenance Matters
- How to Clean Solar Pool Panels
- Inspecting Plumbing Fittings and Checking for Leaks
- Solar Pool Heater Troubleshooting: Diagnosing Common Issues
- Professional Solar Pool Heater Inspection: When to Call an Expert
- Winterizing Your Solar Pool Heating System
- DIY vs. Professional Maintenance: Cost-Benefit Analysis
- Material-Specific Care: EPDM and Polypropylene Panels
- Frequently Asked Questions
Last Updated: September 2, 2026
Why Solar Pool Heating Maintenance Matters
Proper solar pool heating maintenance is the difference between a system that runs efficiently for two decades and one that fails prematurely. Heliocol industrial-grade panels are built to last 20+ years, but only if you treat them right.
The real cost of skipping maintenance isn’t just expensive repairs later, it’s thermal efficiency loss that happens gradually and silently. A solar collector covered in debris transfers heat less effectively. Plumbing fittings with corroded seals develop micro-leaks that drain system pressure. Calcium buildup on panels reduces the sun’s ability to transfer energy to your pool water. Preventative maintenance costs almost nothing compared to reactive repairs: a soft cloth cleaning takes an hour, checking valve integrity takes 30 minutes, and winterizing takes a weekend. But ignoring these tasks can cost thousands.
This guide covers everything you need to know about solar pool heating maintenance, from step-by-step cleaning procedures to troubleshooting common issues and deciding when professional inspection becomes necessary.
How to Clean Solar Pool Panels
Solar collectors accumulate debris faster than most pool owners expect. Dust, pollen, bird droppings, and leaves reduce heat transfer efficiency by blocking sunlight from reaching the absorber surface.
What You’ll Need Before You Start
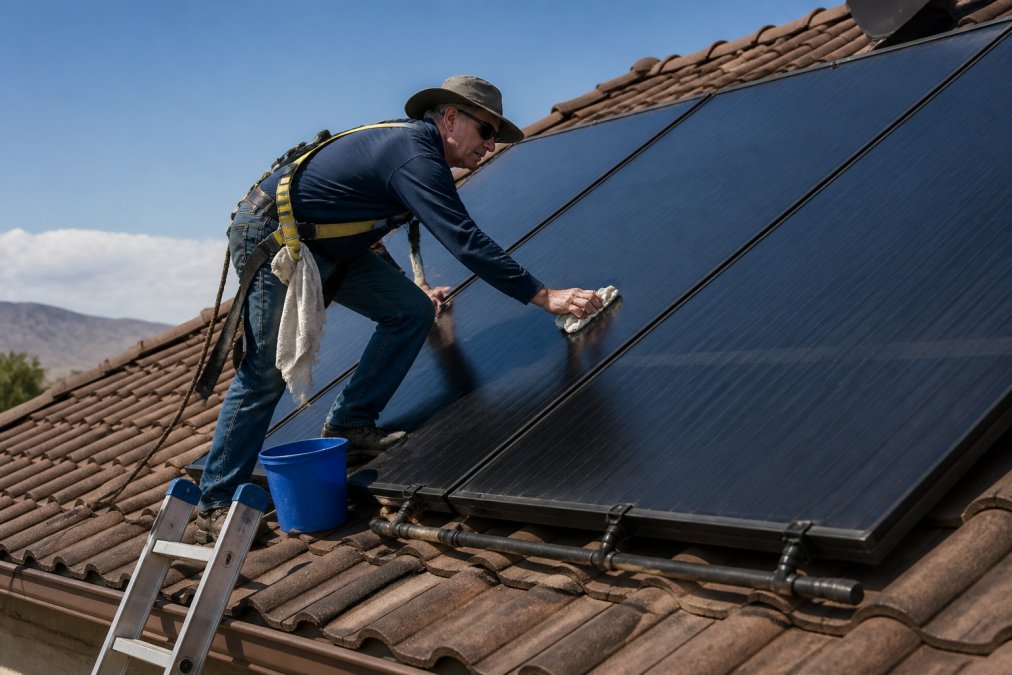
Gather these materials: soft cloth or microfiber towel (never use abrasive scrubbers), bucket of warm water with mild dish soap, garden hose with low-pressure spray setting, sturdy ladder with rubberized feet, safety harness or fall protection equipment, and pressure gauge.
Safety precautions for roof access are non-negotiable. Always wear a safety harness, ensure someone else is present to spot you, and never attempt roof work during high winds or wet conditions. If you’re uncomfortable with heights or your roof pitch is steep, call a professional.
Step-by-Step Cleaning Process
Step 1: Turn off the system and let it cool [Time: 15 minutes]
Shut down your solar pool heating system and allow the panels to cool. Hot panels can cause burns, and water on hot glass surfaces can cause damage.
Step 2: Inspect the panels visually [Time: 10 minutes]
Look for obvious debris accumulation, bird droppings, or algae growth. Light dust requires only water rinsing; heavy buildup needs the soap and cloth approach.
Step 3: Rinse with low-pressure water [Time: 10 minutes]
Use your garden hose on a low-pressure setting, starting from the top and working downward. Never use a pressure washer, as the force can damage seals and the absorber surface.
Step 4: Apply mild soap solution [Time: 15 minutes]
Dip your soft cloth in warm soapy water and gently wipe the panel surface using circular motions. Pay special attention to corners where debris accumulates. Rinse thoroughly with clean water afterward.
Step 5: Dry and inspect seals [Time: 10 minutes]
Use a clean microfiber cloth to dry the panels. Inspect the plumbing fittings around the panel connections for signs of leaks or corrosion. Tighten any loose fittings by hand.
Clean your panels twice a year: once in early spring before peak heating season and once in fall after summer dust accumulation. In areas with heavy pollen or bird activity, quarterly cleaning may be necessary.
Inspecting Plumbing Fittings and Checking for Leaks
Small leaks go unnoticed until system pressure drops significantly, at which point thermal efficiency has already suffered. Your plumbing fittings are the most common leak sources.
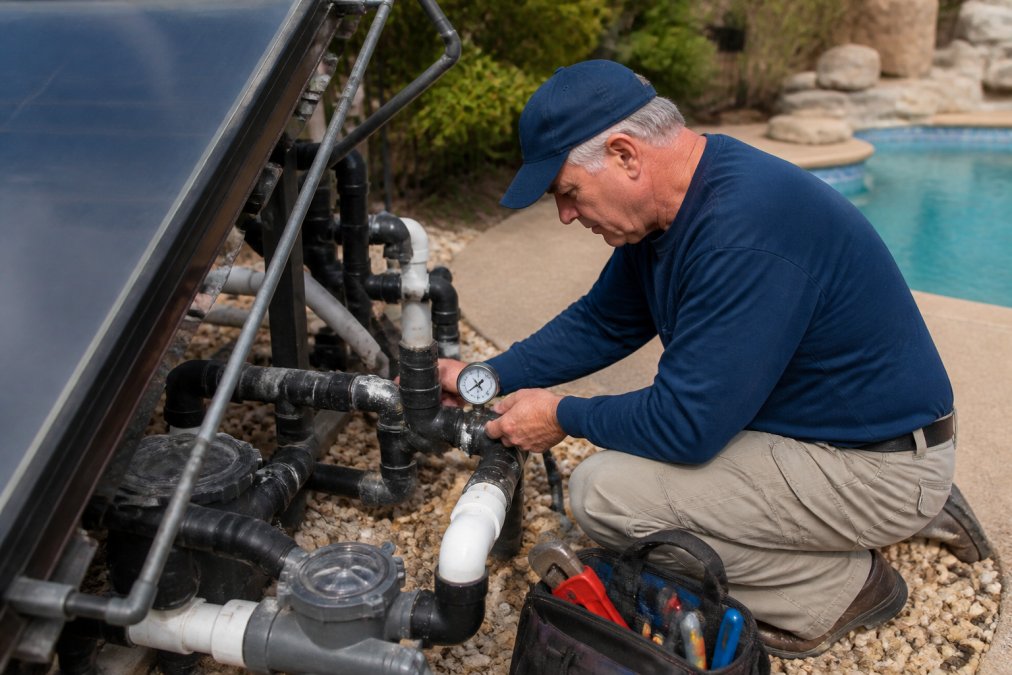
Start with a visual inspection. Look for water staining, mineral deposits, or wet spots around every connection point. Next, check your system’s pressure gauge against the target range specified in your manual. If pressure drops more than 5-10 PSI over a week without system use, you likely have a leak (peer-reviewed research).
For small leaks at threaded connections, try tightening the fitting by hand first. If that doesn’t stop the drip, you may need to replace the seal. Check your system’s valve adjustment points as well. Ball valves and gate valves should move smoothly without grinding sounds. Stiff valves may have internal corrosion and should be inspected by a technician.
Never ignore a leak, even a small one. A drip that seems insignificant can waste thousands of gallons over a season and indicates seal degradation that will worsen.
Solar Pool Heater Troubleshooting: Diagnosing Common Issues
When your pool stops heating as it should, the problem usually falls into one of two categories: inadequate flow or inadequate heat transfer.
Low Flow Rate and Pressure Gauge Readings
Flow rate is the volume of water moving through your collectors per minute. Low flow rate reduces the time water spends in the panels, limiting heat absorption. Check your pressure gauge against your system’s specification.
If pressure is below the normal range, suspect a leak or blocked filter. A clogged filtration system restricts flow dramatically. Check your pool filter’s pressure gauge; if it’s significantly higher than normal, backwash or clean the filter immediately. If the filter is clean but pressure remains low, you likely have a leak in the plumbing. Low flow can also result from an undersized or failing pump. If your pump is original to your system and more than 10 years old, its performance may have degraded.
Inadequate Heat Transfer and Thermal Efficiency
Your pool water should exit the collectors noticeably warmer than it entered. If the temperature rise is minimal, heat transfer is compromised.
The most common culprit is debris on the panel surface. Dirty panels transfer significantly less heat. Check your system’s flow rate as well; water that moves through the collectors too quickly doesn’t spend enough time absorbing thermal energy. Your system should be balanced so water moves steadily but not rapidly.
Calcium buildup inside the collectors is harder to diagnose but worth considering, especially in hard-water areas. Mineral deposits on the absorber surface reduce heat transfer. Professional cleaning with appropriate descaling agents may be necessary if buildup is severe.
Professional Solar Pool Heater Inspection: When to Call an Expert
Call a professional if you encounter: pressure that won’t stabilize after checking for obvious leaks, persistent low flow despite a clean filter, water temperature that doesn’t rise despite clean panels and normal pressure, visible corrosion on copper piping, or any fitting that leaks after you’ve attempted to tighten it.
Professional technicians have pressure testing equipment that can pinpoint leaks you can’t see. They can measure actual heat transfer performance and identify whether your system is operating at design efficiency. A professional inspection typically costs far less than emergency repairs and can extend your system’s lifespan significantly.
Dixie Pool Solar Heating & Misting offers professional solar pool heater inspection services that go beyond visual checks. Our team can test your system’s performance metrics, identify efficiency losses, and recommend targeted maintenance.
Schedule a professional inspection every 2-3 years, even if your system appears to be working fine ([energy.gov](https://www.energy.gov/cmei/femp/life-cycle-photovoltaic-systems-operate-and-maintain-existing-photovoltaic-system)). Early detection of wear prevents expensive failures.
Winterizing Your Solar Pool Heating System
Winter shutdown is critical for system longevity. Freezing temperatures can damage collectors, burst pipes, and degrade seals.
Draining Collectors and System Shutdown
Turn off your pump and allow the system to cool. Close the isolation valves to separate the solar collectors from the main system. Open the drain valves at the lowest points of your collector array and let water drain completely. Any water remaining in the panels can freeze, expand, and crack the absorber or burst connecting pipes.
Drain your system’s check valves and any other low points where water can collect. After draining, leave the isolation valves open so any residual moisture can evaporate. Close your pool cover to minimize debris and heat loss.
Protecting Against UV Degradation and Corrosion
Even while your system is dormant, UV rays and moisture continue to degrade materials. If your collectors are exposed to direct sunlight year-round, consider covering them with reflective tarps during the off-season. This reduces UV exposure and keeps panels cleaner.
Inspect all exposed piping for signs of corrosion. Copper piping develops a patina over time, which is normal and protective. However, bright green or white corrosion indicates active corrosion that should be addressed. Check all rubber seals and gaskets before winter. Seals that are cracked, hardened, or showing signs of deterioration should be replaced now rather than discovered when you restart the system in spring.
DIY vs. Professional Maintenance: Cost-Benefit Analysis
The decision to handle maintenance yourself versus hiring professionals depends on your comfort level, available time, and the specific task involved.
Basic tasks like cleaning panels and visual inspections are low-risk DIY projects. Checking pressure gauges and looking for obvious leaks are similarly safe. Tasks involving plumbing repairs, component replacement, or system pressure testing should typically be left to professionals. These require specialized tools and knowledge.
Consider your system’s warranty as well. Many manufacturers, including the 12-year panel warranty offered by Dixie Pool Solar Heating & Misting, require professional installation and inspection to maintain coverage. A practical middle ground: handle routine cleaning and inspection yourself, but budget for professional service annually.
Material-Specific Care: EPDM and Polypropylene Panels
Different collector materials have different care requirements and longevity profiles.
EPDM (ethylene propylene diene monomer) rubber is common in collector gaskets and seals. EPDM is durable and resistant to pool chemicals, but it degrades under UV exposure over time. Seals that are 15+ years old should be inspected regularly for cracks or hardening.
Polypropylene panels are lightweight and cost-effective, but they’re more susceptible to UV degradation than other materials. Polypropylene becomes brittle over time when exposed to intense sunlight (nist.gov). Covering polypropylene collectors during the off-season extends their lifespan. Heliocol panels use more durable materials designed to resist UV degradation for 20+ years.
Copper piping resists corrosion naturally through patina formation. However, in aggressive environments (high-chlorine pools, areas with acidic water), copper can corrode faster. Never use harsh chemicals or abrasive cleaners on any panel material. Mild dish soap and soft cloths work for all standard materials.
Proper solar pool heating maintenance isn’t complicated, but it does require consistency and attention to detail. The difference between a system that delivers reliable performance for 20 years and one that fails prematurely often comes down to whether the owner understood these fundamentals and acted on them. Dixie Pool Solar Heating & Misting can help with professional inspections, emergency repairs, and guidance on system-specific care. Get a free quote today to discuss your system’s maintenance requirements and ensure you’re protecting your investment properly.
Frequently Asked Questions
How often should I perform solar pool heating maintenance?
Seasonal maintenance is critical for optimal performance. Inspect your system monthly during the heating season, clean panels every 2-3 months or after dust storms, check plumbing fittings and seals quarterly, and perform a comprehensive winterization before the cold months. Regular preventative maintenance extends your system’s lifespan and maintains thermal efficiency. Most homeowners find monthly visual inspections and quarterly detailed checks sufficient to catch issues early.
What’s the difference between cleaning EPDM and polypropylene solar pool panels?
Both materials require gentle care, but polypropylene panels are slightly more UV-resistant and durable long-term, while EPDM requires more careful handling to prevent seal degradation. Use a soft cloth with mild soap and water for both types, avoid abrasive scrubbers. Polypropylene panels can tolerate slightly higher water pressure during cleaning. Check manufacturer guidelines for your specific panel material, as improper cleaning can compromise seal integrity and reduce thermal efficiency on either type.
How do I know if my solar pool heater is working correctly?
Monitor your pressure gauge for normal readings, check that water flows consistently through collectors, and verify that your pool temperature rises steadily during sunny days. If flow rate drops significantly, calcium buildup or debris may be restricting water movement. Measure water temperature at the collector outlet versus inlet, a difference of 10-15 degrees Fahrenheit indicates proper heat transfer. If thermal efficiency seems low despite clear skies, debris removal or professional inspection may be needed to restore performance.
Should I turn off my solar pool heater at night?
Yes, turning off your system at night prevents heat loss and reduces unnecessary circulation. Most systems have automatic controls that stop circulation when collectors cool below pool water temperature, but manual shutdown saves energy and extends component lifespan. Program your pool pump timer to run during peak sunlight hours (typically 10 AM to 4 PM) for maximum thermal efficiency. This practice reduces wear on seals and plumbing fittings while maintaining consistent pool temperature throughout your swimming season.
This article was written using GrandRanker


Leave a Reply