Last Updated: November 20, 2026
Quick Summary
Pool heater corrosion can sometimes be repaired, but only when the damage is limited. A single pinhole or a gasket leak is often worth fixing, while multiple tube failures or rust reaching the burner area mean replacement usually wins. Once a repair exceeds about half the cost of replacement on a unit past 8 years, replacement tends to win on lifecycle math.
- Low pH is the most common cause of internal corrosion, dissolving the protective oxide layer on copper.
- Cupro-nickel and titanium heat exchangers resist salt far better than plain copper.
- Inspect the sacrificial anode yearly and replace it when roughly half consumed.
- Keep pH at 7.4 to 7.6 and total alkalinity at 80 to 120 ppm to protect the exchanger.
- A cabinet rusted through at the base is a safety issue, not a repair.
Table of Contents
- Pool Heater Corrosion Causes: Why Heaters Rust From the Inside Out
- Pool Heater Rust Around the Base: What It Signals and How to Read It
- Telling Condensation, Plumbing Leaks, and Corrosion Leaks Apart
- Saltwater Pool Heater Corrosion Solutions That Actually Hold Up
- A Step-by-Step Corrosion Diagnosis and Repair Workflow
- Pool Heater Repair vs Replacement: Costs, Warranties, and Lifecycle Math
- Corrosion Prevention: Anodes, Chemistry Targets, and Testing Cadence
- Get a Free Quote on a Corrosion-Resistant Heating Setup
- Frequently Asked Questions
Pool Heater Corrosion Causes: Why Heaters Rust From the Inside Out
Pool heater corrosion repair only makes sense once you understand what is eating the metal. Corrosion starts on the water side, where chemistry attacks the heat exchanger, and accelerates outside wherever moisture sits.
The heat exchanger is a bundle of narrow tubes. Hot combustion gas passes one way, pool water the other. Any imbalance in that water turns the tubes into a consumable part.
Water Chemistry Problems That Eat Metal
Low pH is the most common culprit: acidic water dissolves the protective oxide layer on copper and keeps going. Low total alkalinity makes pH swing wildly between scaling and etching, and high salt speeds the electrochemical reaction that produces rust. If you have never checked salinity, our guide on how to test pool water salinity for heaters walks through it step by step.
Moisture, Overspray, and Poor Ventilation
External corrosion comes from outside. Sprinkler overspray, a heater in a low spot that holds water, or an enclosure with no airflow all trap moisture against the metal. Combustion byproducts are mildly acidic and, in a sealed space, condense on the cabinet and eat the paint, then the steel.
Pool Heater Rust Around the Base: What It Signals and How to Read It
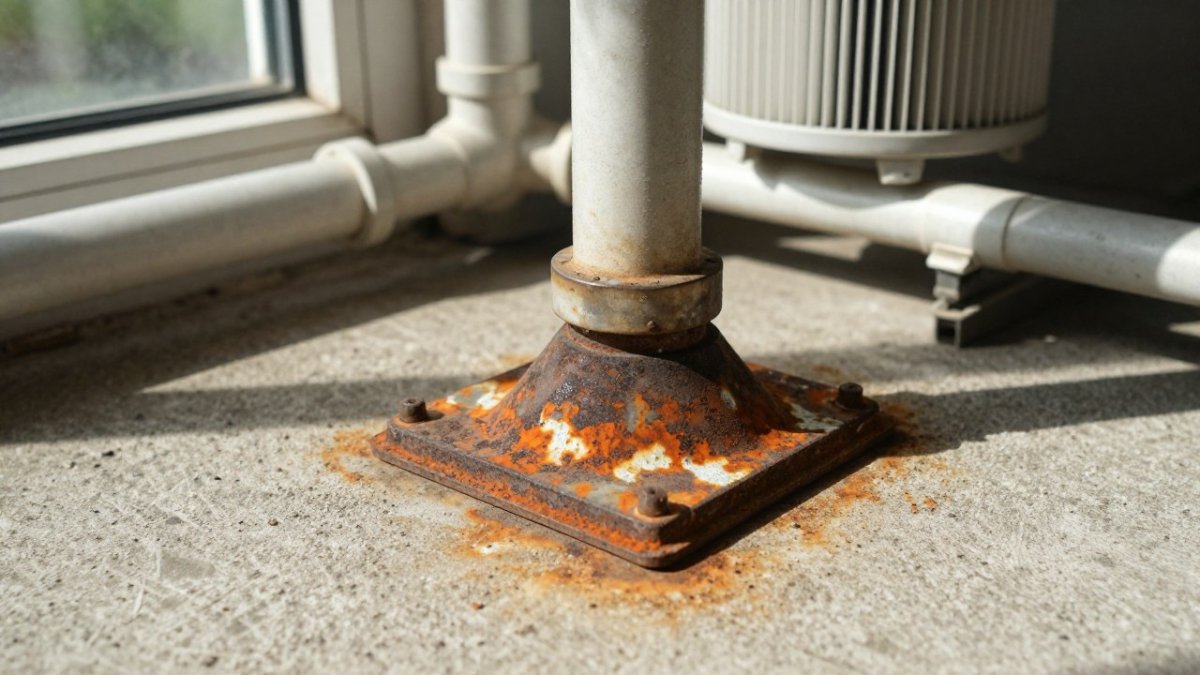
Rust around the base is a symptom, not the disease. It usually means water has been pooling under the unit or the cabinet has been wicking moisture for a long time. Read it in layers:
- Surface rust on the cabinet: cosmetic in most cases, but it will spread if the moisture source stays.
- Rust at the seams and bottom pan: the cabinet is failing. Structural, and it lets water reach the burner area.
- Rust streaks running down from the header: the heat exchanger or its gaskets are leaking.
A common mistake is painting over rust and calling it fixed. The paint traps moisture and the metal keeps thinning underneath.
Telling Condensation, Plumbing Leaks, and Corrosion Leaks Apart
Water under a heater has three possible sources, each with a different fix. Condensation appears when cold pool water meets a hot, humid cabinet, typically on startup and in cool weather, and is normal in small amounts. A plumbing leak from a fitting, union, or header gasket shows as a steady drip that does not stop. A corrosion leak from a perforated heat exchanger tube often shows as water inside the cabinet with the pump running.
Here is a quick diagnostic checklist to separate them:
- Dry the area completely, then run the pump only (no heat) for 30 minutes and check for moisture.
- Run the heater and watch the cabinet interior for a fine mist, which points to a tube pinhole.
- Look for mineral crust around unions and header bolts.
Watch out: a corroded heat exchanger can let combustion gas into the water and water into the burner can. If you smell exhaust near the pool or see a rollout fuse tripped, shut the heater down and call a technician.
Saltwater Pool Heater Corrosion Solutions That Actually Hold Up
Saltwater pools corrode heaters faster because chloride ions drive the electrochemical reaction that rusts standard copper. Salt resistance is a materials problem, not a maintenance trick, so the solutions that hold up change what the water touches.
Materials That Survive Salt: Cupro-Nickel and Titanium
Cupro-nickel heat exchangers resist salt far better than plain copper and remain the common upgrade for saltwater systems. Both cost more upfront; our breakdown of the best corrosion resistant pool heater materials compares how each holds up over time.
Also check the sacrificial anode. Many heaters ship with one, and it corrodes on purpose so the exchanger does not. Inspect it yearly and replace it when it is half consumed.
A Step-by-Step Corrosion Diagnosis and Repair Workflow
Diagnosis follows a fixed order, and skipping steps wastes money. Work through it this way:
- Shut off gas and power. Confirm the pump is off before opening anything.
- Inspect the cabinet and base. Photograph rust patterns before touching them.
- Test water chemistry. Record pH, alkalinity, calcium hardness, and salt level.
- Pressure-test the exchanger. A technician can confirm a tube breach.
- Check flow. A clogged filter or failing check valve causes low water flow, which overheats the exchanger and accelerates corrosion.
- Scope the repair. Decide between a heat exchanger swap, a cabinet repair, or full replacement.
- Verify combustion parts. The rollout fuse, burners, and gas line should be inspected after any water intrusion.
Repair methods have limits. A single pinhole can sometimes be sealed, but a tube bundle with multiple failures will fail again. Replacing the exchanger makes sense when the cabinet and burner are sound; once rust reaches the burner area, replacement usually wins.
Pool Heater Repair vs Replacement: Costs, Warranties, and Lifecycle Math
Pool heater repair vs replacement comes down to three numbers: repair cost, remaining lifespan, and warranty coverage. A heat exchanger replacement on a unit with a solid cabinet can buy several more years. A repair on a heater already past its expected lifespan is money thrown at a losing cause.
What Each Repair Path Actually Costs
Pricing depends on unit size, parts availability, and labor rates. For current pricing and a written quote, contact Dixie Pool Solar Heating & Misting. From there:
- Gasket or union leak repair: usually worth doing on any heater under 10 years old, since the parts are inexpensive relative to a replacement.
- Heat exchanger replacement: the decision point where the math gets interesting; compare the part and labor cost against replacement.
- Cabinet or base pan repair: worthwhile if the rust is surface-level and the structure is sound. If the base is rusted through, this is not a repair, it is a safety issue.
As a general rule, once a repair exceeds about half the cost of replacement on a unit past 8 years, replacement tends to win on lifecycle math.
Warranty Coverage Changes the Equation
Warranty terms matter more than most homeowners realize. Heat exchanger warranties are often longer than warranties on the rest of the heater, but coverage typically depends on proper water chemistry and installation. Read your warranty terms carefully.
Before authorizing any repair, ask the technician to confirm whether the failed part is still under warranty and whether the repair carries a labor warranty.
Lifecycle Math: When Repair Is the Losing Bet
A gas pool heater’s service life depends heavily on maintenance, and it is typically shorter in saltwater or poorly balanced pools. Use this framework:
| Situation | Better Choice | Why |
|---|---|---|
| One pinhole, cabinet sound, unit under 6 years old | Repair | Low cost, good remaining life, likely under warranty |
| Multiple tube failures, rust at burner | Replace | Repeat failures likely; safety risk |
| Cabinet rusted through at base | Replace | Structural, unsafe to run |
| Leak from a fitting or gasket | Repair | Simple fix, cheap part |
| Corrosion from chronic chemistry | Fix chemistry first | New heater will corrode too |
| Repair exceeds 50% of replacement on a unit past 8 years | Replace | Poor lifecycle economics |
Watch out: a quote that only addresses the visible leak without testing water chemistry and flow is incomplete. If the underlying corrosion cause is not corrected, the replacement part will fail the same way.
Pricing varies by unit size and parts availability, so ask for a written quote rather than a phone estimate. If you are leaning toward replacement, our roundup of the best solar pool heater for saltwater systems covers salt-rated options worth considering.
Corrosion Prevention: Anodes, Chemistry Targets, and Testing Cadence
Prevention is cheaper than any repair. The challenge is that ‘keep your chemistry balanced’ is advice every heater manual gives and almost no homeowner can act on without specific numbers. Here are the targets that matter for corrosion specifically, and how often to check them.
Water Chemistry Targets That Protect the Heat Exchanger
These are common industry ranges. Always confirm against your heater manufacturer’s specifications, because cupro-nickel and titanium exchangers tolerate different ranges than standard copper.
- pH: 7.4-7.6. The single most important number for copper corrosion. Below 7.2, water becomes aggressive and dissolves the protective oxide layer on the exchanger. Above 7.8, scale forms and insulates the tubes, causing overheating and stress cracking.
- Total alkalinity: 80-120 ppm. The buffer that keeps pH from swinging. Low alkalinity means pH crashes after rain or a refill; high alkalinity makes pH hard to bring down without muriatic acid.
- Calcium hardness: 200-400 ppm. Too low and water pulls calcium from the exchanger and grout; too high and scale deposits on the tubes.
Testing Cadence
Weekly testing during swim season is the baseline: pH and chlorine every week, and full chemistry, alkalinity, calcium hardness, salt, stabilizer, every two to four weeks. Test again after heavy rain, a large refill, or a shock treatment. In saltwater pools, check salt monthly and after any significant water loss.
Low alkalinity is a common cause of failure: without a buffer, pH can swing between etching and scaling conditions, and the exchanger suffers from both.
Sacrificial Anodes: Inspection and Replacement
Many heaters ship with a sacrificial anode, a zinc or magnesium rod that corrodes on purpose so the exchanger does not.
If your heater did not come with an anode, aftermarket inline anode kits are available and are worth considering on saltwater systems. They install on the return line and are a fraction of the cost of a heat exchanger.
Moisture and Ventilation Controls
Keep sprinklers off the cabinet. Give the heater clearance and airflow in an enclosure, combustion byproducts are mildly acidic and condense on the cabinet in a sealed space. Make sure the base sits on a pad that drains rather than a low spot that holds water.
Our prevention routine for salt systems is laid out in how to prevent salt corrosion on pool heaters, including a testing schedule you can follow.
Get a Free Quote on a Corrosion-Resistant Heating Setup
Corrosion is a common reason pool heaters fail early, and much of it traces back to chemistry and moisture you can control.
Dixie Pool Solar Heating & Misting installs solar thermal systems that use Heliocol panels, which carry a 12-year warranty and are rated to last 20+ years, with a 2-year labor warranty on other installation work.
Get started with Dixie Pool Solar Heating & Misting and extend your swim season from March through November without a corroding gas heater. Request your free solar pool heating quote and we will size a system for your pool.
If your heater is rusting and you are tired of patching it, a corrosion-resistant solar setup may cost less over its life than repeated repairs.
Frequently Asked Questions
What causes corrosion in a pool heater?
The usual culprits are unbalanced water chemistry (low pH, high alkalinity, or out-of-range calcium hardness), constant moisture from leaks or irrigation overspray, and exhaust gases trapped in a poorly ventilated enclosure. Saltwater pools add another layer, since salt and chlorine speed up the breakdown of standard copper heat exchangers. A clogged filter or restricted water flow can also raise internal temperatures and stress metal parts. Identifying which cause applies to your heater is the first step before any pool heater corrosion repair is attempted.
When should a corroded pool heater be replaced instead of repaired?
Replace when the heat exchanger itself is perforated or heavily scaled, when rust has spread across the cabinet and base, or when the unit is near the end of its service life. A cracked or leaking heat exchanger usually cannot be patched reliably, and combustion parts damaged by rust raise safety concerns. Repair makes sense for isolated problems like a failed thermostat, a bad check valve, or surface rust on accessible parts. A pool technician can pressure-test the exchanger to confirm which situation you have.
Can saltwater damage a pool heater?
Yes. Salt and the chlorine it generates are aggressive toward standard copper heat exchangers, and corrosion tends to appear faster in saltwater pools than in traditionally chlorinated ones. The fix is material selection: cupro-nickel or titanium exchangers resist salt far better than copper. Keeping salt level, pH, and alkalinity in range and rinsing splash zones also slows the process. If you are planning a saltwater pool heater corrosion solution, choose the exchanger material before installation rather than after rust appears.
How do you stop corrosion on a pool heater?
Start with water chemistry: test pH, alkalinity, calcium hardness, and salt level weekly and correct drift before it reaches the metal. Fix active leaks and reroute irrigation sprinklers so they stop hitting the cabinet. Keep the heater in an open, well-ventilated spot with clearance from walls and shrubs. Install a sacrificial anode on the plumbing loop, since it corrodes in place of the heat exchanger. Finally, schedule an annual inspection so rust around the base or a failing rollout fuse gets caught early.


Leave a Reply