Table of Contents
- Why Solar Pool Panel Inspections Matter
- Pool-Heating Panels vs. Photovoltaic Panels: Know What You’re Inspecting
- Safe, Ground-Level Inspection Steps to Start With
- Step-by-Step Visual Inspection of Solar Pool Panels
- Solar Pool Panel Leak Detection and Flow Checks
- How to Check If a Solar Panel Is Working
- Your Solar Pool Heater Maintenance Checklist
- Solar Pool Panel Inspection Frequency: How Often Is Enough?
- Frequently Asked Questions
Last Updated: October 17, 2026
Why Solar Pool Panel Inspections Matter
A solar pool panel inspection is a visual and functional check of the collectors, mounting hardware, plumbing, and connections that heat your pool.
Here’s the part most guides get wrong. They treat inspection like a repair job. It isn’t. Your job is to spot changes early and know when to call a pro.
- Panels that quietly lose output still “work” on paper
- Small leaks waste water and drop pressure
- Loose brackets get worse with every windstorm
The good news: you can do most of this from the ground in 15 minutes.
Pool-Heating Panels vs. Photovoltaic Panels: Know What You’re Inspecting
Pool-heating panels and photovoltaic panels are not the same thing. Solar pool panels use the sun’s heat to warm water running through tubes. Photovoltaic panels turn sunlight into electricity.
That difference changes how you inspect them:
- Solar pool panels carry water. Look for leaks, wet spots, and flow problems.
- Photovoltaic panels carry current. Look for cracked glass, hot spots, and wiring issues.
- Pool panels are usually unglazed black plastic. Fading is normal. Cracking is not.
So when you read advice about “solar panel inspection,” check which system it’s describing. The U.S. Department of Energy guide to solar technologies breaks down how solar thermal and photovoltaic systems differ.
Safe, Ground-Level Inspection Steps to Start With
Start your inspection from the ground. Most damage shows up before you ever climb a ladder.
What You Can See From the Ground
Walk the perimeter of your pool equipment and the roof edge. Look up and around. Then check these:
- Water pooling or damp spots near the panels or plumbing
- Visible cracks, sagging, or panels sitting crooked
- Missing or lifted mounting brackets
When You Need to Get on the Roof
Climb up only if you’re comfortable with heights and the roof is dry. If not, call a pro. Roof safety is not worth a fall.
Go up when you spot something from the ground, or when it’s time for a full check. Never walk on the panels themselves. They crack under foot.
Walking or kneeling on solar collectors is the fastest way to crack them. Step only on solid roof decking, and stay off wet or steep sections entirely.
Step-by-Step Visual Inspection of Solar Pool Panels
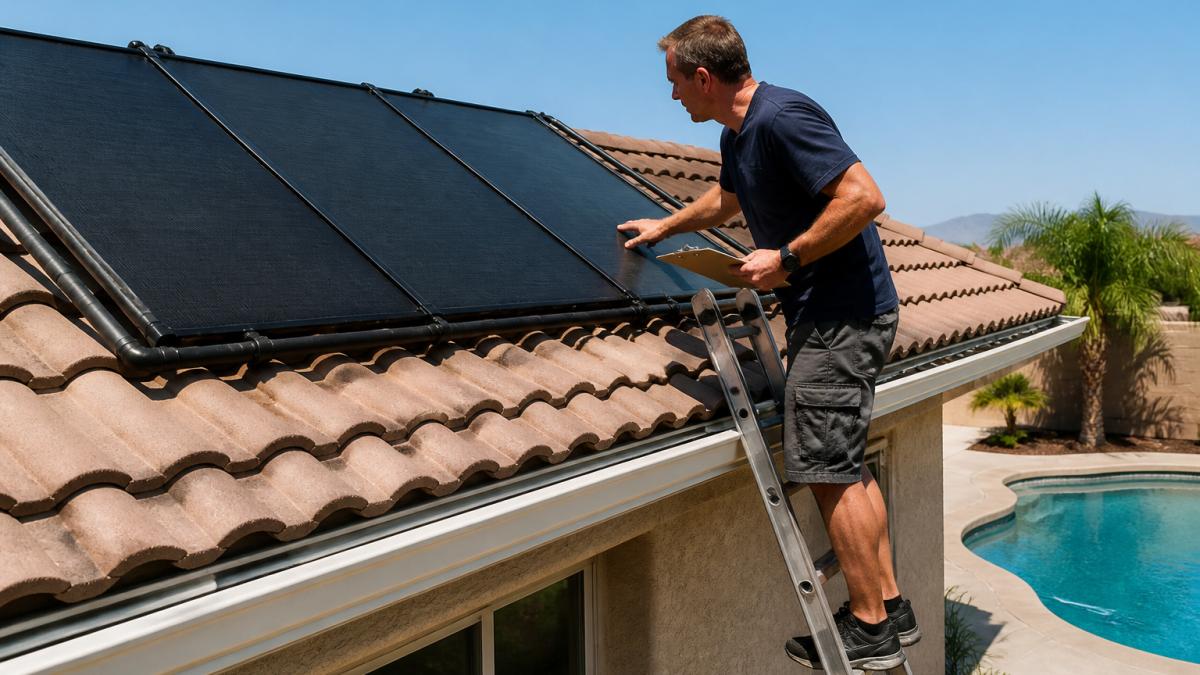
Up close, work panel by panel in a fixed order so you do not skip anything. The sequence below moves from the safest, most visible items to the ones that require more care, and it ends with documentation so you can compare this inspection to the next one.
Step 1: Panel Surfaces, Cracks, and Discoloration
Run your eyes across every panel face and header in a consistent pattern, left to right, top row to bottom row, so a defect cannot hide between glances.
- Cracks or chips in the panel face, headers, or riser tubes
- Discoloration that is uneven or blotchy rather than uniform fading
- Bubbling or delamination where layers begin to separate
- Glass or backsheet damage on any PV-style panels sharing the array
Uniform fading on an unglazed black collector is normal aging. A patchy, spotty, or blistered look can mean heat damage, a blocked tube, or a failing panel. Note the location of anything suspicious, “third panel from the left, lower header” is far more useful to a service tech than “a crack somewhere.”
Step 2: Mounting Hardware, Connections, and Corrosion
Check how the panels are held down and how they connect to each other and to the roof.
- Loose screws, clamps, and brackets that have shifted or backed out
- Corroded fittings, clamps, or metal straps, especially near the coast
- Worn or cracked sealant around roof penetrations
- Loose plumbing unions and slip fittings
Corrosion and loose hardware are the two most common aging signs on pool collectors. Catch them early and they are usually inexpensive fixes; ignore them and wind uplift or water intrusion turns a small repair into a roof problem.
Step 3: Roof Penetrations and Flashing
Where mounts pass through the roof deck, look for cracked sealant, lifted flashing, rust stains, or dark streaks that suggest water is getting under the roofing. These are the findings most likely to cause interior damage, so photograph them even if they look minor.
Step 4: Document and Triage Every Finding
Before you climb down, photograph each defect with something for scale and note its location on a simple sketch of the array. Then sort findings into three buckets:
- Monitor: uniform fading, minor debris, a single loose screw you can retighten
- Schedule service: cracked headers, corroded fittings, worn sealant, several loose mounts
- Address promptly: active leaks, exposed wiring on any PV component, panels lifting off the roof, or unstable mounting hardware
That triage is the step most guides skip, and it is the one that tells you whether to finish your coffee or call a professional today.
Solar Pool Panel Leak Detection and Flow Checks
Solar pool panel leak detection starts at the equipment pad, not the roof, and it works best while the system is actually running in solar mode. A dry system tells you very little; a pressurized one shows you where water and pressure are escaping.
Set Up the System for a Real Test
- Confirm the pump and controller are set to solar mode so water is routed through the collectors.
- Let the system run for several minutes so pressure stabilizes.
- Note the filter pressure gauge reading and the flow at the pool returns.
- Photograph your valve positions before you touch anything.
That baseline, pressure reading, return flow, valve positions, is what you compare against when something changes later.
Check the Equipment Pad First
Most leaks in a pool-heating system are at the pad, not on the roof. Look for:
- Drips at the pump, filter, and valve unions
- Water trails or mineral staining on the pad
- A pressure gauge that reads higher or lower than your baseline
- Air bubbles visible in a pump basket or returning to the pool
Low flow with air bubbles often points to a suction-side air leak or a clogged filter, not a panel leak. Fix the simple causes first: clean the filter, confirm every valve is fully open, and check the pump basket O-ring.
Check the Collectors and Roof Deck
With the system running, look for:
- Drips or wet streaks on the roof decking below or beside the panels
- Staining or soft spots on fascia, soffit, or roofing under the array
- Damp or discolored insulation visible from an attic access
- Damaged headers, cracked riser tubes, or separated panel edges
A leak at a header or union often shows as a steady drip only when the system is pressurized, which is why the running-system check matters.
Isolate the Leak by Zone
If you cannot see the source, isolate sections of the array using the valves at the pad. Close one zone at a time, watch the pressure gauge and the roof, and note which zone changes the symptom. This narrows a roof-wide search to a few panels and gives a service tech a head start.
Know When to Shut Down
- Active leak on the roof or at the pad: shut off the pump and close the solar valve until it is repaired.
- Exposed wiring on any PV component: keep people away and call a qualified professional.
- Unstable mounting hardware: stop using the system and schedule service before wind or water causes more damage.
Mark your valve positions with a photo before you touch anything. A valve left half-closed after a check is one of the most common reasons a system suddenly stops heating.
How to Check If a Solar Panel Is Working
To check if a solar panel is working, compare the water going in with the water coming out. If the return water is warmer than the pool on a sunny day, the system is doing its job.
Simple ways to confirm:
- Feel the return line: warm water means heat is moving
- Check the pool thermometer before and after a sunny day
- Confirm the pump and controls are set to solar mode
- Look for a steady, strong flow at the returns
No warmth on a bright day points to a flow problem, a control setting, or a panel issue. That’s your cue to dig deeper or call for service.
Your Solar Pool Heater Maintenance Checklist
A solar pool heater maintenance checklist keeps you consistent. Run through it monthly during swim season.
| Check | What to Look For | How Often |
|---|---|---|
| Panel surfaces | Cracks, chips, discoloration | Monthly |
| Mounting hardware | Loose screws, brackets, corrosion | Monthly |
| Plumbing and unions | Leaks, drips, loose fittings | Monthly |
| Flow and pressure | Weak flow, air bubbles | Weekly |
| Debris and shade | Leaves, dirt, new shade | Weekly |
| Roof penetrations | Worn sealant, staining | Seasonally |
Keep it simple. A quick look beats a big repair.
Solar Pool Panel Inspection Frequency: How Often Is Enough?
Solar pool panel inspection frequency depends on the season and your setup. Check the basics weekly during swim season, do a full visual inspection monthly, and book a professional inspection once a year.
Here’s a sensible rhythm:
- Weekly: glance at flow, pressure, and debris
- Monthly: full ground-level and roof check
- Seasonally: inspect sealant and roof penetrations
- Annually: professional inspection and tune-up
Our Heliocol panels are built to last 20+ years and carry a 12-year warranty, and regular checks help you get every year out of them.
Most solar pool panel problems are visible long before they cost you money. A 15-minute monthly look is the cheapest maintenance you’ll ever do.
Frequently Asked Questions
Can you inspect solar pool panels from the ground?
Yes, you can catch a lot from the ground. Walk the perimeter of your roof line and look for visible cracks, sagging panels, discoloration, or water stains on the roof deck below the panels. Check the pool equipment pad for drips at the plumbing connections and confirm water is flowing through the system when the pump runs. Ground-level checks are safe and quick, but they cannot confirm loose mounting brackets, sealant failure, or hairline cracks in the panel surface. Use them as a first pass, then schedule a closer inspection when something looks off.
How often should solar pool panels be inspected?
Plan a quick visual check at the start of every swim season, before you rely on the system to heat the pool. Do a more thorough inspection once a year, ideally in early spring before heavy use. If your area sees hail, high winds, or hard freezes, add an inspection after each event. Panels that are more than 10 years old benefit from twice-yearly checks. Catching a small leak or a loose bracket early usually means a simple repair instead of a full panel replacement.
How can you tell if solar pool panels are leaking?
Look for water pooling on the roof, dripping from the panel frame, or wet spots on the roof deck beneath the array. At the equipment pad, check for moisture around the plumbing unions and valves. A pressure drop on the system gauge, air bubbles returning to the pool through the return jets, or a pump that keeps losing prime are also signs. Small leaks often start at fittings and couplings rather than the panel itself, so inspect those connections first before assuming the panel needs replacement.
What should you do if a solar pool panel is damaged?
Shut off the pump and isolate the damaged section if your system has valves that allow it. Photograph the damage and note the date. Small cracks in the panel surface or a leaking union can often be repaired, while a shattered collector or a cracked manifold usually calls for replacement of that panel. Do not climb onto a wet or steep roof to attempt a fix yourself. Call a qualified solar pool heating technician, especially if the damage involves the mounting system or roof penetrations, so the repair does not compromise your roof.
A cold pool in the middle of swim season usually traces back to a problem you could have caught early. If your inspection turns up damage, a leak, or a system that just isn’t heating like it used to, don’t wait for it to get worse. Dixie Pool Solar Heating & Misting installs Heliocol panels built to last 20+ years, backs them with a 12-year warranty, and offers low-maintenance systems with no operating costs. Get a free quote and keep your pool warm from March through November.


Leave a Reply