
Table of Contents
- Why Winterizing Your Solar Pool Heater Matters
- Preparing Your Pool and System for Winter Shutdown
- How to Blow Out Solar Pool Panels and Prevent Freeze Damage
- Solar Pool Heater Freeze Protection Strategies
- Winterizing Pumps, Filters, and Bypass Valves
- Solar Pool Heating System Repair vs Replacement After Winter
- Common Winterization Mistakes to Avoid
- Spring Reopening and System Inspection Checklist
- Frequently Asked Questions
Last Updated: October 5, 2026
Why Winterizing Your Solar Pool Heater Matters
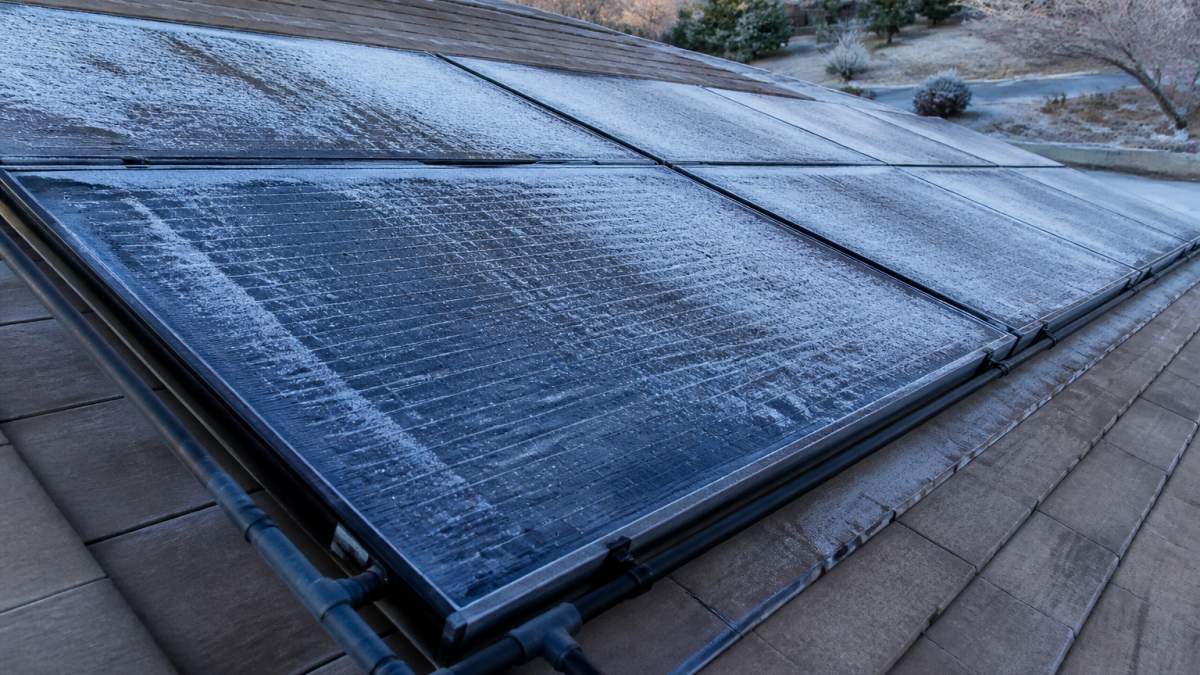
Proper solar pool heater winterization prevents freeze damage to pipes, collectors, and equipment. Water expands when it freezes, cracking lines, bursting collectors, and destroying expensive components.
With the right approach, you can prevent freeze damage and keep your system ready for spring.
Winterization prevents permanent damage, costs far less than repairs, extends your system’s lifespan to 20+ years, and ensures faster spring startup. The process involves balancing water chemistry, draining equipment, isolating collectors, and protecting exposed lines.
Preparing Your Pool and System for Winter Shutdown
Before you touch your solar system, your pool itself needs preparation. This foundation work prevents water chemistry problems and makes the shutdown process smoother.
Balance water chemistry before closing
Test your water for pH (7.2-7.6), alkalinity (80-120 ppm), and chlorine (1-3 ppm). Adjust as needed. Add a winter algaecide to prevent algae blooms in stagnant water. This balanced state protects your plumbing and equipment during cold months.
Clean the pool thoroughly
Remove leaves, debris, and algae using a skimmer net. Brush walls and floor, then run your filter for several hours. A clean pool is easier to maintain during winter and ready faster in spring.
Lower water level appropriately
Lower your pool water level to 12 to 18 inches below the skimmer opening to prevent water from entering skimmer lines and freeze damage. Use a submersible pump or your pool pump to drain slowly. Never drain below the tile line.
How to Blow Out Solar Pool Panels and Prevent Freeze Damage
Removing water from your collectors and lines is the single most important step in solar pool heater winterization to prevent freeze damage.
Isolate solar collectors from circulation
Turn off your pump and heater. Close the isolation valve on the solar system line to stop water from flowing between your pool and collectors. If your system lacks an isolation valve, check your manual for bypass valve procedures.
Using compressed air safely and effectively
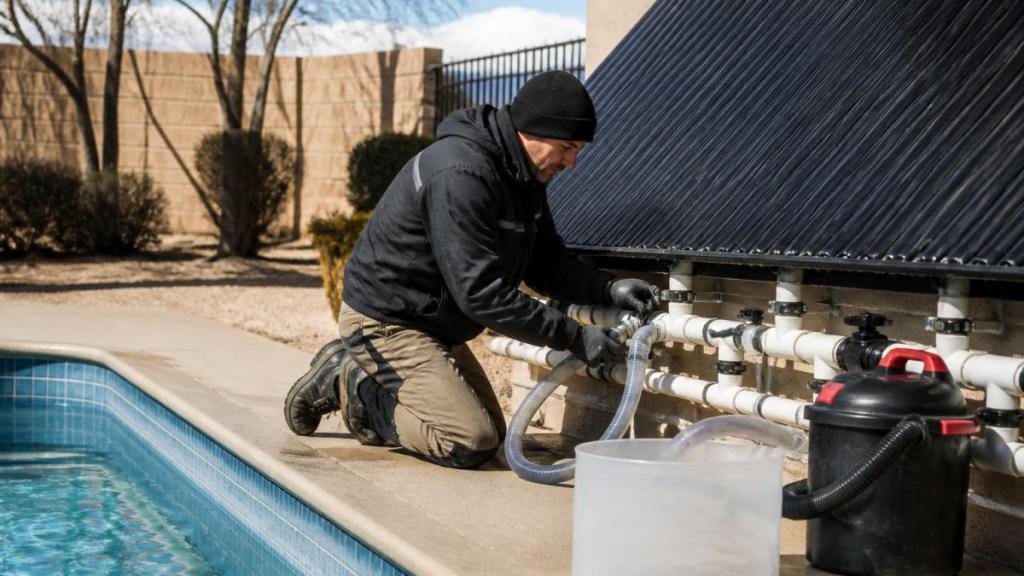
Use an air compressor with a regulator set to 50-80 psi maximum. Connect to the solar system’s return line and let air flow for 15-20 minutes. Work from the lowest point upward to let gravity assist drainage. Never exceed 80 psi, as excessive pressure damages collectors and lines.
Verifying complete drainage
This step separates a rushed winterization from a thorough one. After blowing out the lines, you need to confirm all water is gone.
Open the drain plugs at the lowest points of your system. Water should drip out briefly, then stop. If water continues flowing, keep the air compressor running until it stops completely.
Check all accessible lines and fittings for moisture. Some water may remain in hard-to-reach areas. If your system has a check valve, water can get trapped behind it. You may need to manually open the valve or remove a drain plug downstream to release trapped water.
Once no water drips from any drain point, your system is properly drained. Mark your drain plugs or take a photo so you remember which ones you opened, you’ll need to close them before spring startup.
Solar Pool Heater Freeze Protection Strategies
Different climates require different approaches. Your location determines how aggressive your winterization needs to be.
Freeze-climate versus mild-climate approaches
If you live in an area where temperatures regularly drop below 35 degrees Fahrenheit, you need full winterization. This means draining all water from collectors, lines, and equipment. Freeze protection is non-negotiable because even a single night below freezing can crack a collector.
In milder climates where freezing is rare or brief, you have more options. Some systems can run on a low-temperature circulation mode, where a small amount of warmer water keeps lines from freezing. Others can use drain-back systems that automatically empty lines when the pump shuts off.
Check your system’s manual for freeze protection options. Some Heliocol systems are designed to drain back automatically. Others require manual intervention. Know which type you have before winter arrives.
Draining equipment and removing drain plugs
Locate all drain plugs on your pump, filter, and heater. These are usually brass or plastic fittings at the lowest points of each component. Open each one slowly to let water drain into a bucket.
Start with the filter, then the pump, then the heater. Let each component drain for several minutes. Some water may drain quickly, then slow to a trickle. That’s normal, residual water will drip out over time.
Leave drain plugs open during winter. This prevents water from accumulating and freezing inside equipment. Before spring startup, you’ll close these plugs again and refill the system.
If your system has a salt cell for chlorination, remove it before winter. Salt cells can be damaged by freezing. Store the cell indoors in a dry location.
Winterizing Pumps, Filters, and Bypass Valves
Your pump, filter, and bypass valves need specific attention. These components are vulnerable to freeze damage if water remains inside.
Step-by-step pump and filter shutdown
Turn off power to your pump at the breaker. Never work on electrical equipment while it’s powered on.
Locate the pump’s drain plug, usually at the lowest point on the pump housing. Open it and let water drain completely. Some pumps have a second drain plug, check your manual.
For your filter, open the drain valve at the bottom. Backwash the filter first if it’s a sand or cartridge filter. This removes trapped water and debris. Then open the drain valve and let the filter tank empty completely.
If your filter has a multiport valve on top, turn it to the “Closed” or “Winter” position if available. This isolates the filter and prevents water from sitting inside during cold months.
Leave all drain plugs open during winter. This allows any residual water to escape and prevents pressure buildup.
Closing valves and opening bypass solar lines
Locate your system’s main isolation valve and the bypass valve. The isolation valve stops water from flowing to the collectors. The bypass valve redirects water around the solar system back to the pool.
Close the isolation valve completely. Turn the handle until you feel resistance, don’t force it.
Open the bypass valve fully. This ensures water flows around the solar system, not through it. If your system uses a three-way valve, set it to the bypass position.
Some systems have check valves that prevent backflow. These don’t need adjustment, they work automatically. But if you notice water flowing backward when the pump is off, you may have a stuck check valve. A professional can service this.
| Winterization Step | Component | Action |
|---|---|---|
| Isolate collectors | Isolation valve | Close fully |
| Bypass solar | Bypass valve | Open fully |
| Drain filter | Filter tank | Open drain valve |
| Drain pump | Pump housing | Open drain plug |
| Drain heater | Heater tank | Open drain valve |
| Blow out lines | Compressed air | Run 15-20 minutes at 50-80 psi |
| Verify drainage | All drain points | Confirm no water drips |
Solar Pool Heating System Repair vs Replacement After Winter
Spring brings questions: Does my system still work? Do I need repairs? When is replacement necessary?
Most systems come through winter without damage if winterized properly. Turn on your pump in spring and listen for normal operation. Water should flow smoothly with no strange noises. Check for leaks at connections and drain plugs.
If your system won’t hold pressure or water leaks from collectors, you may have freeze damage. A cracked collector or burst line usually requires replacement. Heliocol panels are built to last 20+ years, but freeze damage can shorten that lifespan significantly.
Small leaks at fittings can sometimes be repaired by tightening connections or replacing O-rings. Larger cracks in collectors or lines typically require component replacement. The cost of replacement depends on which part failed and your system’s size.
If your system suffered freeze damage, consult a professional before attempting repairs. Improper fixes can cause more damage. Many solar heating companies offer inspection services in spring to catch damage early.
Common Winterization Mistakes to Avoid
Learning from others’ mistakes saves time and money. Here are the most common errors we see:
Not lowering the water level enough. Water left too high in the pool can overflow into skimmer lines and freeze there. Always lower to 12 to 18 inches below the skimmer.
Skipping the blowout step. Some pool owners think simply closing valves is enough. Water trapped in collectors will freeze and crack them. Always blow out lines with compressed air.
Using excessive air pressure. More pressure doesn’t mean better drainage. Pressures above 80 psi damage collectors and fittings. Stick to the manufacturer’s recommended range.
Leaving drain plugs closed. Trapped water in equipment freezes and expands. Open all drain plugs and leave them open through winter.
Not verifying drainage. You can’t see inside pipes and collectors. Opening drain plugs and watching water drip confirms the system is truly empty.
Ignoring the manual. Every solar heating system is slightly different. Your manual contains specific instructions for your equipment. Follow them, not generic advice.
Winterizing too early or too late. Winterize after the last warm spell but before sustained freezing begins. In most areas, October or early November is ideal. Waiting until December risks freeze damage from early cold snaps.
Spring Reopening and System Inspection Checklist
When warm weather returns, your solar heating system needs a careful restart. Rushing this process can introduce air into lines or damage components.
Close all drain plugs you opened in fall. Check that each one is tight. Refill your pool to normal operating level, typically 50 percent up the skimmer opening.
Open the isolation valve slowly. This allows water to flow back into the solar collectors gradually.
Turn on your pump and listen for normal operation. You may hear air moving through lines initially, this is normal.
Inspect collectors for visible damage. Look for cracks, loose fittings, or water pooling on the surface. Check all exposed pipes for damage or separation.
Test your temperature sensor and controls. The sensor should read the current water temperature accurately. Your controller should display normal readings and allow you to set the desired temperature.
Run the system for a full day and monitor water temperature. Solar heating takes time to raise pool temperature, especially in spring. A 2 to 3 degree increase per day is normal.
Winterizing your solar pool heater properly protects your investment and ensures reliable performance for years to come. The process takes a weekend but saves thousands in repair costs.
Frequently Asked Questions
Do I need to drain my solar pool panels for winter?
Yes. Draining solar pool panels is critical in freeze-prone climates. Water left in collectors and lines expands when frozen, causing cracks and permanent damage. In mild climates, some systems can operate with freeze protection, but complete drainage is the safest approach. Verify that all water is removed from collectors, pipes, and drain spigots before freezing temperatures arrive.
What is the best way to prevent freeze damage in solar pool heaters?
The best freeze protection strategy combines isolation, drainage, and proper valve positioning. Isolate solar collectors by closing bypass valves, use compressed air to blow out all water from panels and plumbing lines, and remove drain plugs to allow any remaining water to escape. In freeze climates, lower your pool water level below the skimmer and drain equipment completely. These steps prevent water expansion that cracks collectors and pipes.
Should I use compressed air to clear my solar pool panels?
Yes, but with proper pressure limits. Compressed air effectively removes water from solar collectors and plumbing when used correctly. Keep pressure within the manufacturer’s recommended range to avoid damaging panels or O-rings. Start at lower pressures and increase gradually. Blow air through collectors in the direction of water flow, and always verify complete drainage afterward. If you’re unsure about pressure settings, consult your system’s manufacturer instructions or hire a professional.
How do I know if my solar pool heater is properly winterized?
A properly winterized solar pool heater has no water in collectors, pipes, or equipment. Check that all drain plugs are removed or drain spigots are open, bypass valves isolate solar collectors, and pump and filter circulation has stopped. In spring, inspect for any visible cracks, corrosion, or water stains on panels and connections. If you see water pooling or frost damage, your system may need professional repair or component replacement.


Leave a Reply