
Table of Contents
- Roof-Mounted vs. Ground-Mounted Pool Solar Panels
- Pool Solar Panel Mounting Brackets and Hardware
- Matching Mounts to Your Roof Type
- Flat Roof Solar Panel Mounting Options
- Solar Pool Heater Roof Space Requirements
- Roof-Mounted Solar Pool Heater Installation, Step by Step
- Roof Load, Wind Uplift, and Structural Safety
- Conclusion
- Frequently Asked Questions
Last Updated: October 20, 2026
Roof-Mounted vs. Ground-Mounted Pool Solar Panels
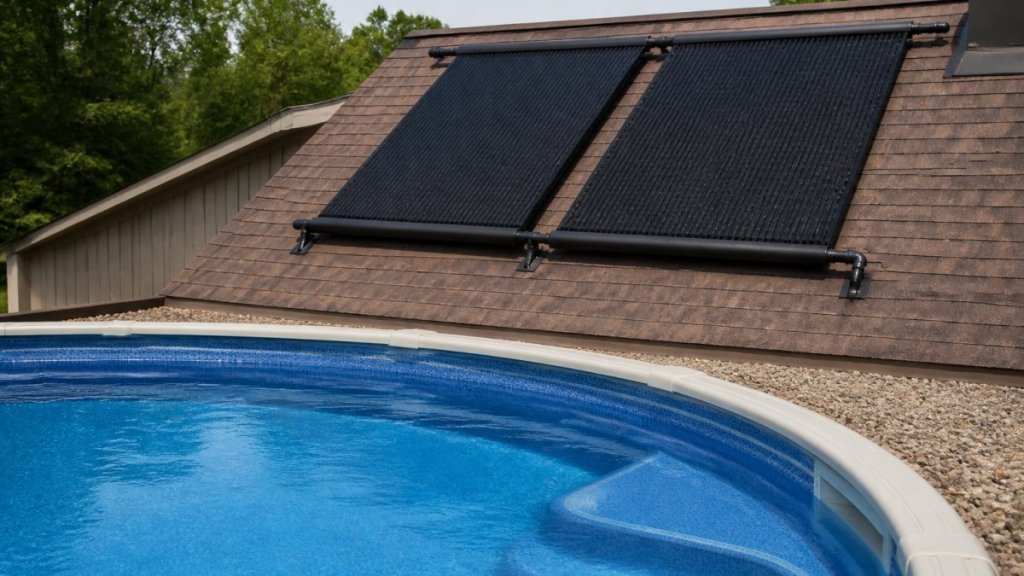
The best roof mounting options for small pool solar panels put them where the sun hits hardest: your roof. A roof mount uses space you already own, keeps equipment out of the yard, and lifts the panels above fences and trees that cast shade.
At Dixie Pool Solar Heating & Misting, we install solar thermal systems that extend swimming season from March through November, and the mounting decision drives everything that follows.
Ground mount still has a place: when your roof faces the wrong way, sits in shade most of the day, or you want the simplest service access. A ground rack also lets you set the mounting angle exactly.
Here is the trade-off in plain terms:
| Factor | Roof Mount | Ground Mount |
|---|---|---|
| Space used | Existing roof area | Yard or side lot |
| Shade exposure | Usually higher up, less shaded | Vulnerable to fences and trees |
| Service access | Needs roof access | Easy, walk-up access |
| Structural review | Roof load and wind uplift matter | Rack foundation matters |
| Aesthetics | Hidden from the yard | Visible from the yard |
This guide covers brackets, roof types, flat roofs, space planning, and a step-by-step install sequence, plus structural safety and freeze protection.
Pool Solar Panel Mounting Brackets and Hardware
Pool solar panel mounting brackets clamp the panel frame to rails or directly to the roof structure. The hardware set is small but decides whether the array survives a windy spring.
A typical small-system kit includes:
- Mounting rails in aluminum or steel, cut to the panel row length
- Mounting brackets that bolt rails to the roof deck or rafters
- Mounting straps for securing panel frames to rails
- Roof anchors or lag bolts rated for the deck material
- Clamps and end caps to hold the panel frame without crushing it
- Sealant and flashing for every penetration
Aluminum mounting dominates residential pool work because it resists corrosion and stays light. Steel costs less but needs proper coating to survive sun and pool-chemistry air.
What most guides miss: the bracket is only as strong as what it bites into. A bracket lagged into thin sheathing pulls out long before the bracket fails, so fasteners must reach solid framing, not just the roof surface.
Skipping sealant on even one roof penetration is the most common cause of leaks after a pool solar install. Water finds the unsealed hole within a season, and the repair usually costs more than the sealant would have.
Matching Mounts to Your Roof Type
Mounting compatibility starts with the roof surface. The wrong attachment method voids a roofing warranty or creates a leak path you will fight for years.
Tile, Shingle, and Metal Roof Attachment Methods
Asphalt shingle roofs are the most forgiving. Installers lift the shingle course, set a flashed bracket against the deck, seal it, and lay the shingle back over the top.
Tile roofs need tile hooks or replacement mounts that slip under the tile and fasten to the framing below, avoiding drilling the tile.
Metal roofs split into two camps. Exposed-fastener metal uses brackets that seal around the fastener; standing-seam metal uses clamps that grip the seam with no penetration at all, the cleanest option available.
Flat roofs get their own section below because they behave differently.
The pattern holds across all of them: match the attachment to the surface and never assume one bracket fits every roof. If unsure what is under your roofing, inspect before ordering hardware.
Flat Roof Solar Panel Mounting Options
Penetrating mounts bolt through the membrane and deck into framing, then get sealed with a flashing boot and sealant.
Non-penetrating ballasted mounts hold the array down with weighted trays, blocks, or a ballasted rack, suiting membranes where drilling is prohibited.
Hybrid mounts combine a few perimeter penetrations with ballast or adhesive in the field, common on commercial roofs and workable for small pool arrays when perimeter framing is accessible but the field is not.
Tilted racks raise the panels off the membrane. A tilt frame is usually necessary for pool collectors because a flat panel drains poorly, collects debris, and can stagnate water in the headers.
Three flat-roof specifics that generic PV guides skip:
- Drainage path. The array must not dam water at the roof drain or scupper. Leave a clear drainage channel and set the low edge of the rack so water flows around, not under, the panels.
- Membrane compatibility. Some single-ply membranes are damaged by certain sealants and adhesives. Confirm the compatible sealant with the membrane manufacturer before any penetration or adhered base.
- Edge and corner zones. Wind uplift is highest at corners and perimeters. Keep ballast and attachment heaviest there, and avoid placing the lightest part of the array at the most exposed corner.
For small pool arrays, a low-tilt penetrating rack is usually the best balance of strength, drainage, and service access.
A ballasted rack sized for photovoltaic modules can be undersized for water-filled pool collectors. Calculate ballast using wet panel weight plus plumbing, and confirm the roof’s live-load capacity before installation.
Solar Pool Heater Roof Space Requirements
Solar pool heater roof space requirements are set by collector area and plumbing layout, not pool volume alone.
Plan for these space needs:
- Collector footprint: the panel rows themselves, measured as the wet panel dimensions, not the shipping box.
- Row spacing: gaps between rows for plumbing, airflow, and service hands. A common working gap is 12 to 24 inches, more if the rows are tilted.
- Header clearance: room at the top and bottom of each row for the supply and return headers and manifold connections. Headers add length beyond the panel face.
- Service access: a walkable path to reach fittings, unions, and the vacuum relief valve.
- Setback from edges: distance from ridges, valleys, eaves, and penetrations so wind uplift and water flow are not concentrated at the array edge.
Panel layout matters as much as total area. A long, narrow strip of roof can hold the same square footage as a square patch but forces long plumbing runs and more fittings, meaning more friction loss and leak points. Measure the usable rectangle first, then size the array to fit it.
Orientation and tilt. Face the collectors toward the sun for the longest part of the day. For pool heating, a shallow tilt of roughly 10 to 15 degrees is often the practical choice because it sheds rain and debris and drains when the pump shuts off.
Plumbing and drainage specifics that PV guides skip. Pool collectors carry water, so the layout must account for:
- Header orientation. Supply and return headers should be arranged so the panels drain by gravity when the pump stops. A low return header that traps water is a freeze risk.
- Vacuum relief. A vacuum relief valve at the high point lets air in so the panels drain. Without it, water can be held in the panels by suction.
- Friction loss. Keep the run from the pool pump to the panels short and use sweep elbows rather than sharp fittings. Long runs and many fittings raise pump head and reduce flow.
- Stagnation. Panels full of water in the sun without circulation can get hot enough to degrade some materials; drain-down design and a controller that runs the pump during peak sun help.
- Freeze protection. In areas with hard freezes, plan drainage and freeze protection into the design from day one; manual drain valves, automatic drain-down, or freeze sensors are common approaches.
Walk your roof lines with a tape measure before ordering anything. Photograph the shaded areas at mid-morning and mid-afternoon. Two photos often reveal that the “perfect” roof face is shaded exactly when you want to swim, and they also show where the plumbing can run without crossing a ridge or valley.
Roof-Mounted Solar Pool Heater Installation, Step by Step
Roof-mounted solar pool heater installation follows a fixed sequence.
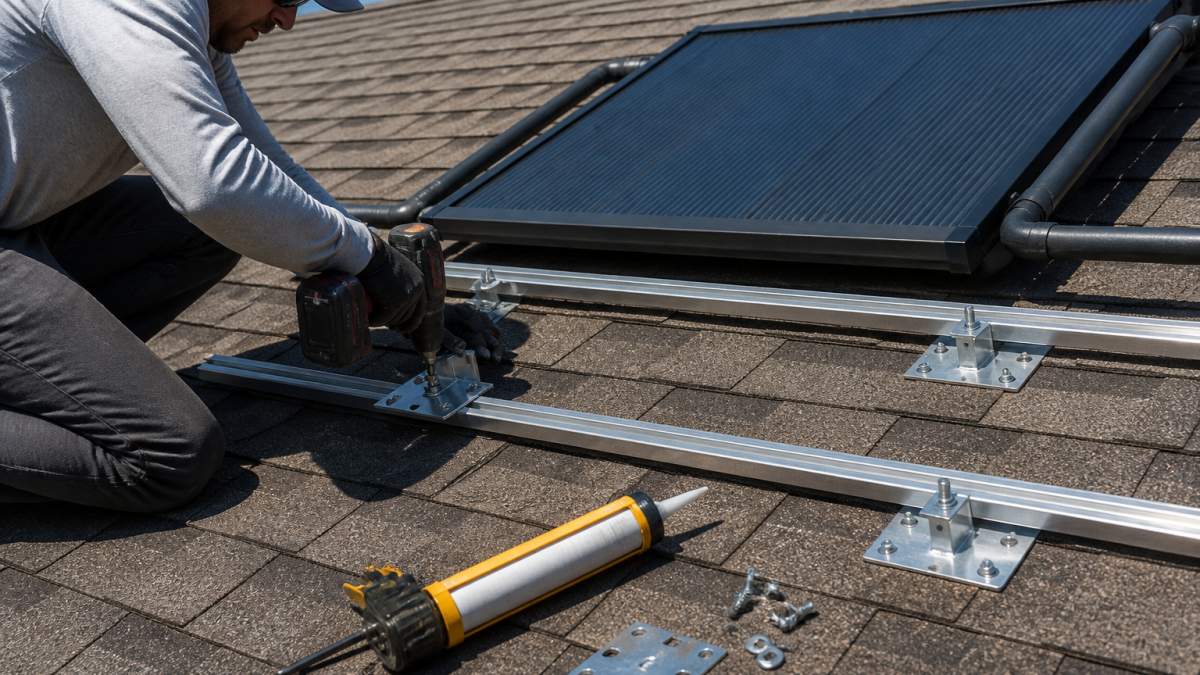
Step 1: Confirm the structure. Verify rafters or trusses can carry the panel load plus wind uplift.
Step 2: Mark the layout. Snap chalk lines for rail positions and panel rows.
Step 3: Set the roof anchors. Fasten brackets into solid framing, lifting shingles or tile as needed.
Step 4: Install the mounting rails. Bolt rails to the brackets and check them for level and square.
Step 6: Connect the plumbing. Run supply and return lines from the pool pump to the panel headers.
Step 7: Pressure test and commission. Check every joint for leaks, confirm water circulation, and verify the system drains properly.
Sealing Penetrations and Protecting the Roof
Leak prevention is a discipline, not a single product. Every roof penetration gets three layers of defense: a physical flashing that sheds water, a sealant bead under and around the fitting, and placement so water never pools against the fixture.
Roof protection also means protecting the surface itself. Set planks or pads where you kneel and set tools down, especially on tile and membrane roofs. Walk on the safe zones, not the field of the roof.
Plumbing deserves the same care. Slope the supply and return lines so the system drains when the pump shuts off; standing water in exposed lines freezes and splits fittings in a cold snap.
Roof Load, Wind Uplift, and Structural Safety
Roof load and wind uplift decide whether a solar array stays put. Roof load is the dead weight of panels, rails, and water in the lines; wind uplift tries to peel the array off during a storm.
Both forces concentrate at the attachment points, which is why bracket spacing, fastener depth, and framing contact matter more than total panel weight. A light array on weak anchors fails faster than a heavier array on solid framing.
Three practical safety rules:
- Fasten into framing, not sheathing. Anchors must reach rafters or trusses.
- Follow the manufacturer’s spacing. Bracket and rail spacing is engineered, not arbitrary.
- Check edge zones. Corners and edges see the highest wind uplift, so attachment there needs extra attention.
If your roof is older or you are unsure of the framing, have it inspected before installation. This is one area where guessing is never worth it.
Conclusion
The hard part of small pool solar is not the panel; it is matching the mount to your roof, structure, and freeze risk. Get those three right and the system runs quietly for years.
Dixie Pool Solar Heating & Misting installs Heliocol panels built to last 20+ years, backed by an industry-best 12-year panel warranty and a 2-year labor warranty. Our systems use solar thermal energy with no operating costs, and they are professionally integrated into your existing pool equipment.
Get a free quote from Dixie Pool Solar Heating & Misting and start planning a system that keeps your pool usable from March through November.
Frequently Asked Questions
What is the best type of roof mounting for small pool solar panels?
There is no single best mount for every home. On pitched shingle or tile roofs, aluminum mounting brackets paired with rails and sealed roof anchors are the standard choice because they hold the panel frame above the roof surface and allow airflow. On flat roofs, a tilted rack or ballasted ground-style frame works better. The deciding factors are your roof material, your local wind exposure, and how much roof space you have, so the right mount is the one matched to your specific roof.
Do small pool solar panels need roof penetrations?
Most pitched-roof installations do require some roof penetration to anchor the mounting brackets securely. Each hole should be sealed with proper flashing and roof-grade sealant to prevent leaks. Flat-roof systems can often avoid penetrations entirely by using ballasted racks weighted with blocks. If you want to skip drilling, ask your installer whether a ballasted or ground-mount layout fits your property, since that choice affects wind resistance and panel placement.
How much roof space do small pool solar panels need?
A common rule of thumb is that the collector area should be a significant portion of the pool’s surface area. Panels are typically about 4 feet wide and 8 to 12 feet long, so a small system may need a substantial amount of unshaded roof. You also need clearance around the panels for mounting rails and plumbing, plus a south-facing section that gets sun most of the day.
Can pool solar panels be mounted on a flat roof?
Yes. Flat roofs are common for pool solar because the panels can be set on tilted racks aimed toward the sun. Many flat-roof systems use ballasted mounting, where the rack is weighed down with blocks instead of drilled into the roof surface, which avoids penetrations and leak risk. Keep in mind that flat-roof racks need proper spacing for wind uplift and drainage, and the tilt angle should be set to match your latitude for the best solar heating.


Leave a Reply